
How to Photograph Handbags, Wallets and Leather Goods for Online Stores
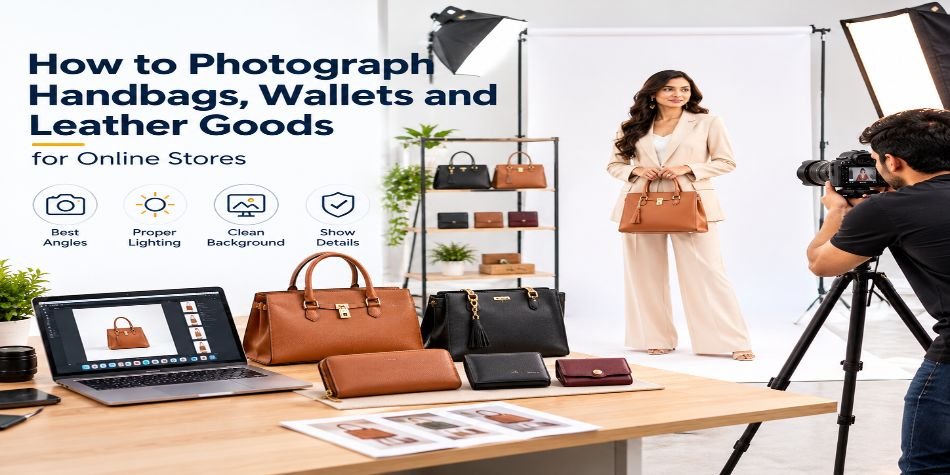
To photograph a wallet or handbag well, light it with one large soft source from the side, shape the product with tissue so it holds its form, shoot front, back, interior and a close-up of stitching, and leave a little natural wear in the retouch. Leather sells on texture and structure, so a flat, evenly lit, over-cleaned photo loses the sale.
Leather is awkward. It reflects like plastic in some places and swallows light like velvet in others. The inside of a wallet is a black hole. A bag slumps the moment you set it down. And buyers can’t touch any of it, so the photo has to do the touching for them.
This guide walks through the setup for wallets, belts, handbags and similar leather goods, whether you’re shooting with a phone on a table or briefing a studio.
What a leather product photo needs to show
Before the technique, the goal. A buyer of leather is checking four things:
-
Shape. Does it hold its form, or collapse?
-
Texture and grain. Is it real-looking, smooth, pebbled, glossy?
-
Build. Stitching, edges, zips, hardware, lining.
-
Capacity. How many card slots, how deep the pocket, what fits inside.
Every shot you take should answer at least one of those. A fifth angle that answers none is wasted. (We cover how many angles a listing needs in this guide.)
Step 1: Prepare the product
Most bad leather photos are decided before the camera comes out.
-
Wipe it down. Fingerprints and dust show up in photos at a scale you never notice in person. A dry microfibre cloth is enough.
-
Shape it. Stuff bags, wallets and pouches with acid-free tissue paper so they hold a rounded, filled shape. Don’t overstuff, or you’ll stretch the seams.
-
Hold it in place. Small pins or clear fishing line can steady a strap or flap. They’re easy to remove in editing.
-
Hide the tags. Take off packaging, price tags and loose threads unless you’re showing them deliberately.
Step 2: Set up soft light
The one big rule: use a large, soft light source, placed to the side.
A window with a white translucent curtain works. A softbox or a shoot-through umbrella works better. Taping the curtain flat matters more than it sounds, because folds create streaks in the light, and streaks show up as stripes across glossy leather.
Place the light to one side of the product, slightly in front. This rakes across the surface, which brings out grain and stitching. A light straight on from the camera flattens the texture and gives you the dull, plasticky look sellers complain about.
Then add a white card or reflector on the opposite side to open up shadows. Adjust it until the dark side is readable, not blown out.
Step 3: Control reflections and colour cast
Leather picks up colour from everything near it. A green shirt on the other side of the room can tint a tan bag. A blue wall can cool the whole photo.
-
Shoot against a plain, neutral backdrop, and keep coloured objects (and yourself in a red top) out of the reflection path.
-
For glossy leather, tilt the product slightly so the light source reflects away from the lens, not into it.
-
Put a grey card in the first frame of a set, so colour can be corrected consistently in editing.
Step 4: Shoot the right angles
For a wallet:
-
Front, full frame. The product fills most of the image, edge to edge sharp.
-
Back. Checks for stitching and any back pocket.
-
Open, showing the interior. Card slots, note compartment, coin pocket.
-
Slightly angled, showing depth. This is the shot that explains thickness.
-
Close-up on a detail. Stitching, a logo emboss, hardware.
-
Scale shot. A hand holding it, or cards sticking out of the slots.
For a handbag, add: a side view, base, strap detail, the interior open with the lining visible, and the bag with a few items inside to show capacity.
The interior needs its own light. The inside of bags and wallets is dark, and the camera meters for the bright outside. Raise the light angle, or add a small reflector pointing in, until the interior is readable without blowing out the rest. Shoot it as a separate exposure if you have to.
Step 5: Edit lightly
Retouch what distracts, and leave what is character.
-
Remove: dust, loose threads, glue marks, fingerprints, harsh creases on polished leather, pins and fishing line.
-
Keep: the natural variation in grain, soft edge wear, and the gentle colour shift of real leather. Cleaning away all of it makes the product look like rubber.
-
Match colour across a set. Every wallet in a catalogue should look like it was photographed on the same afternoon, even if it wasn’t.
The single most common mistake we’d flag is over-smoothing. A photo that looks too perfect makes buyers suspect it’s a render or a cheap synthetic, and it hurts trust more than a visible stitch does.
Marketplace rules to remember
For marketplace listings, your first image generally needs a clean, plain background with the product filling most of the frame, and no text or watermark. We go through the background step by step in our white background photography guide. Lifestyle and in-hand shots belong in the later slots.
If your leather listings are getting views but not sales, this checklist of common product photo mistakes is worth a read.
DIY or studio?
For one or two wallets, a window, a white sheet and a phone can produce a good result if you follow the steps above. For a range of belts, wallets and bags that all need to match, a studio is simpler, because consistent light and consistent editing are exactly what a studio is set up for.
SnapRich shoots wallets, belts, handbags and clutches from our Rohini, Delhi studio; see the wallet photography page. Our starting rate of Rs 49 per photo applies to eligible high-volume catalogue work, and more involved leather shoots are quoted by the job.
FAQ
How do you photograph a wallet for an online store?
Shape it with tissue, light it from the side with a large soft source, and shoot the front, back, open interior, an angled view and a close-up of stitching. Edit lightly and keep natural grain.
What lighting is best for leather products?
A large, soft, diffused source to one side, with a reflector on the opposite side. Avoid direct light from the camera position, which flattens texture.
How do I stop reflections on glossy leather?
Tilt the product so the light source reflects away from the lens, use diffused light, and keep coloured objects out of the reflection area.
How many photos does a handbag listing need?
Typically front, back, side, base, interior, strap or hardware detail, and a scale or in-use shot. Six to eight covers most bags.
Should I remove creases and scratches in editing?
Remove distracting creases, fingerprints and dust, but keep natural grain and light wear. Over-retouching makes leather look artificial.
Can I shoot leather products with a phone?
Yes, with window light, a white backdrop and a steady setup. Tap to focus, wipe the lens, and shoot at the highest resolution.
Get an accessories shoot. Send your product type and quantity on WhatsApp (+91 95603 20309) for a quote.
Trusted by 150+ Brands in India


























What Customers Say About SnapRich
Based on 118 reviews

Tarun Arora

SnapRich truly exceeded our expectations! We hired them for our product shoot and the results were sharp, vibrant, and professionally edited. The team was punctual and easy to work with. Definitely one of the best photography services in India. Highly recommended!
Vivek 007
I had a great experience with SnapRich. Their attention to detail and the way they handled lighting during our corporate shoot was impressive. The photos turned out amazing. If you're looking for a reliable and skilled product photographer, this is the team to go for
Saurabh Pal
SnapRich delivered exactly what we needed. The shoot was organized well, and the quality of the images was top-notch. They’re very professional and understand brand requirements perfectly. One of the best photography services we’ve used so far. Great job!
Neha Joshi
Very happy with the photography service from SnapRich. They’re well-equipped, punctual, and know how to capture products in the best way. The images came out crisp and helped boost our online catalog. A reliable team for product photography in India.
Vikram Saini
Excellent work by the SnapRich team. From setup to final edits, everything was smooth. Their product photography service brought life to our collection. You can tell they’re passionate and skilled. One of the best in the business. Will definitely rebook!
Get in Touch
We’re just a message away – connect with SnapRich!
Book Your FREE Photography Consultation Now!

Our USP
Unbeatable Price
Professional photography starting from ₹49 per photo. No hidden costs. Affordable for all—from startups to big brands.
Fast Delivery
Need it quick? We offer express delivery in 24–72 hours so your listings go live on time, every time.
On-Time, Every Time
We never miss deadlines. Our process ensures timely delivery—smooth from booking to final delivery.
Studio-Grade Quality
15+ years of experience, high-end equipment, and editing precision deliver stunning visuals for any platform.
- Address: A-1/59, 1st Floor, Sector-6, Rohini Delhi-110085
- Email: info@snaprich.in
- Phone: +91-9560520309
Popular Search
- Handbags & Clutches
- Fan & Ventilation
- Bra
- Kurta Palazzo Set
- Kurti
- Lingerie / Bikini
- Panty
- Tops
- Boots
- Formal Shoes
- Bellies Sandals
- Earrings
- Leather Shoes
- Slippers
- Sandals
- Heels
- Electric Vehicles
- Medical & Healthcare
- Construction & Infrastructure
- Female Model
- Corporate Headshot
- Air Cooler
- Lock & handles
- Wall Mount
- Miscellaneous Hardware
- Handbags & Clutches
- Fan & Ventilation
- Bra
- Kurta Palazzo Set
- Kurti
- Lingerie / Bikini
- Panty
- Tops
- Boots
- Formal Shoes
- Bellies Sandals
- Earrings
- Leather Shoes
- Slippers
- Sandals
- Heels
- Electric Vehicles
- Medical & Healthcare
- Construction & Infrastructure
- Female Model
- Corporate Headshot
- Air Cooler
- Lock & handles
- Wall Mount
- Miscellaneous Hardware