
White Background Product Photography: Step-by-Step Guide for Marketplace Sellers
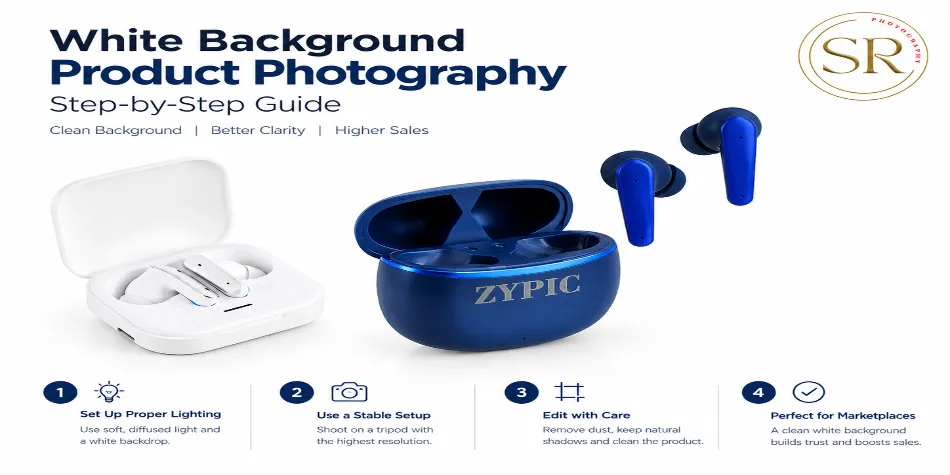
To get a clean white background, light the backdrop separately from the product so it renders as pure white (RGB 255, 255, 255), light the product with a large soft source, shoot on a stable tripod at the highest resolution, and finish with a gentle edit that cleans dust and keeps a natural shadow. Marketplaces expect this look for your main image.
Everybody thinks a white background shot is the easy one. Put product on white paper, press button. And then the photo comes back with a grey-ish background, a dirty gradient in the corners, a hard shadow, and a product that looks dull.
Here’s why that happens, and how to avoid it.
Why the background looks grey
Because your camera is trying to make everything average. When you photograph a mostly white scene, the camera’s meter decides it’s too bright and darkens it, so white turns light grey. That’s why a white sheet “looks white” to your eyes and grey in the photo.
Fixing it means two things: giving the background more light than the product, and telling the camera to expose for that.
What marketplaces expect
Specs come from different sources, and they aren’t always consistent, but the commonly cited targets for a main image are:
-
Amazon: pure white background (RGB 255, 255, 255), product filling roughly 85% of the frame, at least 1,000 px on the longest side so zoom works, and 1,600 px or more recommended. One guide notes that Seller Central’s current rules override any third-party summary.
-
Flipkart: square, 1000 x 1000 px or larger, with a plain white background for most categories and an exception for apparel. See our Flipkart image requirements guide.
-
Both: no text, logos, watermarks or borders on the main image.
Our Amazon requirements guide goes into slots and image counts.
What you need
-
A camera or recent phone, and a tripod (this is non-negotiable; handheld shots drift and blur)
-
A white sweep: white paper, acrylic sheet or a white cloth, curved up behind the product so there’s no horizon line
-
A large soft light for the product: softbox, umbrella, or a window with a white curtain
-
One or two lights for the background, if you have them
-
White foam board or card as reflectors
-
A grey card (helpful for colour accuracy)
Step 1: Build the sweep
Place the sheet so it curves smoothly from the table up the wall. No creases, no seam, no wrinkles. A hard fold becomes a visible line in the photo.
Put the product well forward of the back edge, not touching the backdrop. Distance helps separate the product from the background and reduces spill from the background’s light onto the product’s edges.
Step 2: Light the background separately
This is the step that gets you pure white.
Place a light on each side of the backdrop (or one in front of it, angled), pointing at the white sheet and not at the product. You want the background about one stop brighter than your product light. In practice: check the preview, and raise the background light until the background goes fully white without creeping onto the product.
If you only have one light, light the background first, then use a window or a reflector for the product.
Step 3: Light the product softly
Use a large, soft source to one side and slightly in front. Add white card on the opposite side to fill shadows. Keep the light off the background.
For reflective items such as steel, glass or glossy plastic, make the light source bigger and move it so the reflection falls somewhere harmless. For leather and bags, see our leather photography guide.
Step 4: Set exposure
-
Shoot in manual mode, or use exposure compensation of about +1 stop.
-
Use the lowest ISO your light allows.
-
Close the aperture a bit (around f/8 for a camera) so the whole product is sharp.
-
Use the histogram: you want the background spike pushed right to the edge, without the product’s whites clipping into pure white as well.
-
Turn on the clipping warning (the “blinkies”). The background should blink. The product shouldn’t, except in specular highlights.
On a phone: tap to focus on the product, drag the exposure slider up until the background reads white, and use a tripod or stack of books to keep it still.
Step 5: Shoot all the angles
Shoot front, back, sides, detail and a scale shot. Don’t move the tripod between shots if you can avoid it, and use a timer or remote so the camera doesn’t shake.
For how many angles you really need, see this guide.
Step 6: Edit
A light edit goes a long way:
-
Crop to the marketplace ratio and leave margin (about 5 to 10% around the product).
-
Levels or curves: push the background to 255 white. Use the eyedropper on the background; the readout should say 255, 255, 255.
-
Clean up dust, scratches and sensor spots.
-
Keep a soft contact shadow under the product so it doesn’t float. Some marketplaces accept this; check your category.
-
Correct colour against the grey card or the actual product, so what the buyer receives matches the photo.
-
Export as high-quality JPEG in sRGB.
For difficult edges, such as fine hair, fringe, mesh or transparent plastic, studios use a clipping path or masks. If you have a lot of those, it’s often cheaper to pay for the editing.
Common mistakes
-
Grey background from a camera that exposed the scene as “average”
-
Shadows from a hard light source
-
A background light that spills onto the product and washes it out
-
Creased paper or cloth
-
Product photographed too small in the frame
-
A colour cast from the surroundings
-
Over-brightening, which removes detail from white products
-
Shooting different products under slightly different lights, so a catalogue looks inconsistent
White background vs lifestyle: when to use each
Types of product photography used in e-commerce usually include white background packshots, lifestyle, in-use, flat lay, ghost mannequin, scale shots, infographics and 360 spins. Not every product needs all of them.
-
White background: the main image on almost every marketplace. Clean, comparable, quick to produce.
-
Lifestyle: goes in later slots, or on your own website. It sells feel: scale, context, how it’s used.
-
Infographic: features and measurements, in later slots.
A rule that holds up: white first, lifestyle second. The white image wins the click in search results; the lifestyle image wins the decision on the product page. If photos aren’t turning views into sales, this list of common mistakes might show why.
When to hire a studio
If you have fewer than ten simple products, DIY is realistic. Beyond that, or for glossy, transparent or tiny products, consistency and editing time start to matter. Our Rohini, Delhi studio does white-background catalogue work, and our starting rate of Rs 49 per photo applies to eligible high-volume catalogue jobs. More complex items are quoted by the shoot. See our Delhi product photography page.
FAQ
What background is best for product photos?
Pure white for the main image on most marketplaces, because it’s clean and comparable. Use lifestyle or coloured backgrounds in later images.
How do I get a pure white background in product photos?
Light the background separately and brighter than the product, expose for the background, and finish by checking that the background reads 255, 255, 255 in your editing software.
What is e-commerce product photography?
It’s photography made to sell products online: white-background packshots, lifestyle images, detail shots, flat lays, ghost mannequin shots, scale images and 360 spins.
Do I need a lightbox?
A lightbox helps for small items, but a table, a white sheet and a window can do the same job for larger ones.
Why does my white background look grey?
The camera meters for an average scene and darkens a mostly white frame. Add light to the background or raise exposure compensation.
Should I add a shadow under the product?
A soft contact shadow often looks more natural than none, but check your marketplace and category rules.
Marketplace specs are drawn from third-party guides; verify them in Seller Central or your seller panel.
Book a white-background shoot. Send your product category and quantity on WhatsApp (+91 95603 20309) for a quote.
Trusted by 150+ Brands in India


























What Customers Say About SnapRich
Based on 118 reviews

Tarun Arora

SnapRich truly exceeded our expectations! We hired them for our product shoot and the results were sharp, vibrant, and professionally edited. The team was punctual and easy to work with. Definitely one of the best photography services in India. Highly recommended!
Vivek 007
I had a great experience with SnapRich. Their attention to detail and the way they handled lighting during our corporate shoot was impressive. The photos turned out amazing. If you're looking for a reliable and skilled product photographer, this is the team to go for
Saurabh Pal
SnapRich delivered exactly what we needed. The shoot was organized well, and the quality of the images was top-notch. They’re very professional and understand brand requirements perfectly. One of the best photography services we’ve used so far. Great job!
Neha Joshi
Very happy with the photography service from SnapRich. They’re well-equipped, punctual, and know how to capture products in the best way. The images came out crisp and helped boost our online catalog. A reliable team for product photography in India.
Vikram Saini
Excellent work by the SnapRich team. From setup to final edits, everything was smooth. Their product photography service brought life to our collection. You can tell they’re passionate and skilled. One of the best in the business. Will definitely rebook!
Get in Touch
We’re just a message away – connect with SnapRich!
Book Your FREE Photography Consultation Now!

Our USP
Unbeatable Price
Professional photography starting from ₹49 per photo. No hidden costs. Affordable for all—from startups to big brands.
Fast Delivery
Need it quick? We offer express delivery in 24–72 hours so your listings go live on time, every time.
On-Time, Every Time
We never miss deadlines. Our process ensures timely delivery—smooth from booking to final delivery.
Studio-Grade Quality
15+ years of experience, high-end equipment, and editing precision deliver stunning visuals for any platform.
- Address: A-1/59, 1st Floor, Sector-6, Rohini Delhi-110085
- Email: info@snaprich.in
- Phone: +91-9560520309
Popular Search
- Handbags & Clutches
- Fan & Ventilation
- Bra
- Kurta Palazzo Set
- Kurti
- Lingerie / Bikini
- Panty
- Tops
- Boots
- Formal Shoes
- Bellies Sandals
- Earrings
- Leather Shoes
- Slippers
- Sandals
- Heels
- Electric Vehicles
- Medical & Healthcare
- Construction & Infrastructure
- Female Model
- Corporate Headshot
- Air Cooler
- Lock & handles
- Wall Mount
- Miscellaneous Hardware
- Handbags & Clutches
- Fan & Ventilation
- Bra
- Kurta Palazzo Set
- Kurti
- Lingerie / Bikini
- Panty
- Tops
- Boots
- Formal Shoes
- Bellies Sandals
- Earrings
- Leather Shoes
- Slippers
- Sandals
- Heels
- Electric Vehicles
- Medical & Healthcare
- Construction & Infrastructure
- Female Model
- Corporate Headshot
- Air Cooler
- Lock & handles
- Wall Mount
- Miscellaneous Hardware